The Surprising Trick to Flat Abdominals and a Strong Core

So you work out, eat right, lift weights, follow every fitness trend (or not)–but you may still have that little (or big) bulge on your stomach. My mother calls it the “ponch.” On men, it’s the gut or keg or…you get the picture.

Before scouring the internet for the latest exercises or strange devices that promise results, check in–can you touch your toes with straight legs? If not, your hamstrings, the muscles on the back of your thighs, may be to blame.

In Pilates, every exercise we do is in some way related to the idea of “neutral pelvis.” This is the position when your hip bones are facing directly ahead, they are not tilted one way or the other. If you were to lie on your back, those hip bones would be facing directly to the ceiling with bent knees. Working from neutral pelvis is the key to getting the muscles in the lower part of your trunk to fire. It’s often not just your rectus abdominus, but also the iliopsoas and pelvic floor muscles. If you can get them strong, they will support your lower back and much of your back pain can be eliminated. You can also feel confident wearing low rise jeans.

But–if you have tight hamstrings, you can’t physically be in neutral pelvis while standing. That means all day long, when you sit, stand, run–you are not toning that tummy. You can go to the gym for hours a day or bike, hike, whatever, but if your hamstrings are very tight–you won’t get the results you desire.

There is a lot to this idea of Pilates and I recommend getting started with an instructor knowledgable about “west coast” Pilates style for a broader perspective on neutral pelvis. But in the meantime, start stretching your hamstrings!

Here is a stretch to get you started from my lovely students Donnyale and Ann:

IMG_3771 IMG_3772

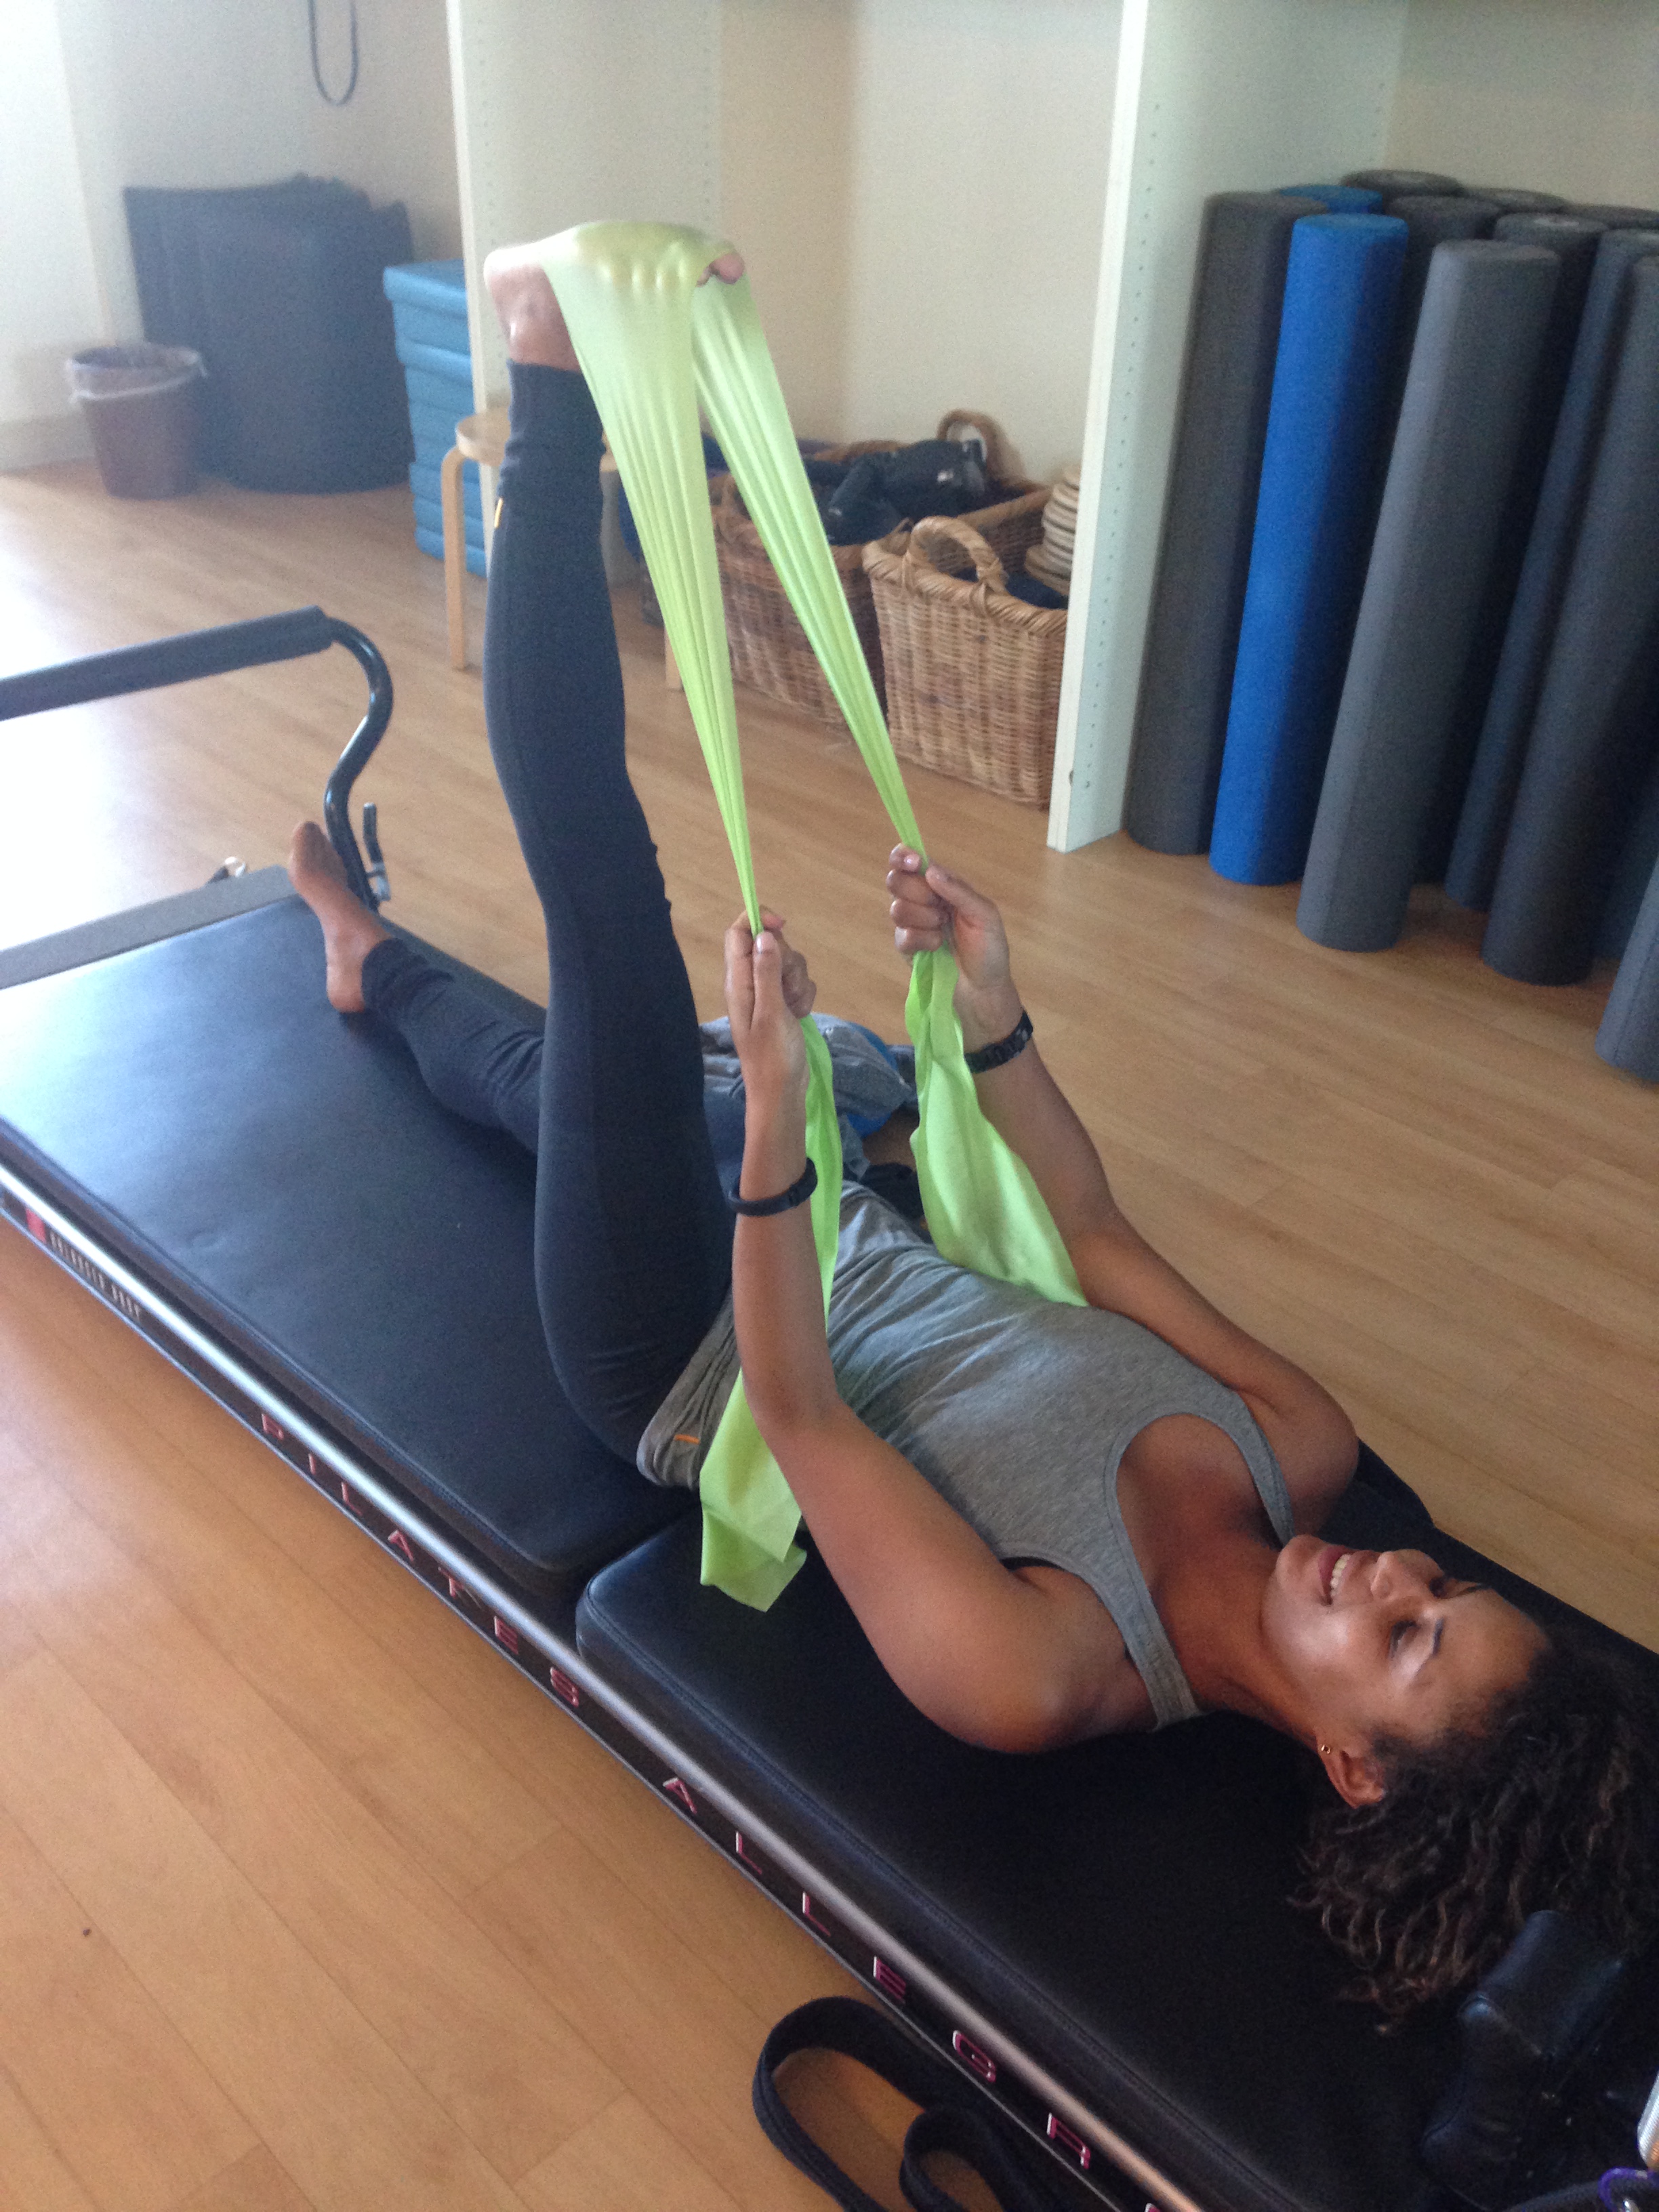
You want to be able to have a totally straight leg. Once your leg is at a 90 degree angle and totally straight, there will no longer be a  shift in your pelvis away from neutral. Grab a belt, towel, loop from your bathrobe–any tool to help you accomplish this. You do not need a fancy theraband or yoga strap.

And–if you favor group exercise classes, don’t leave early and skip the stretches. You are doing your body a disservice. Your tummy will thank you as it becomes more toned.

One of the reasons that post natal women often struggle with the ponch is that their pelvis has totally shifted during the pregnancy so it takes awhile to get it back to neutral. Post natal students should most definitely stretch their hamstrings to hasten the progress.

Cheers!

Advertisement

The only abdominal/core exercise you’ll ever need

Crunches are over-rated. In a desk-bound, car-bound world, we don’t need anything else to bring our shoulders forward. If you do one exercise, let it be a plank on your elbows:

IMG_3751

This will get your stomach toned and strong and support your posture. Notice how my hips are in line with my shoulders and ankles. Pull your stomach in to your back as if you are in a high school reunion picture that will be posted all over Facebook.

Make sure you don’t arch your back:

IMG_3753

Lift your bottom above your shoulders:

IMG_3752

Or, scrunch your shoulders to your ears:

IMG_3754

Send those ears away from your shoulders as if you are under a waterfall in Hawaii or wherever your happy place may be.

Now, a good goal is to be able to hold this plank for two minutes. Here is your schedule to accomplish this in two weeks. Yet– I must mention that this is an exercise program. A plank is an exercise. Do these moves at your own risk and be sure to consult a doctor before starting any new exercise.

Day 1: Hold for 10 seconds. Repeat 3 times.

Day 2: Hold for 10 seconds. Repeat 3 times.

Day 3: Hold for 20 seconds. Repeat 2 times.

Day 4: Hold for 20 seconds. Repeat 3 times.

Day 5: Hold for 30 seconds. Repeat 3 times.

Day 6: Hold for 40 seconds. Repeat 3 times.

Day 7: Hold for 50 seconds. Repeat 3 times.

Day 8: Hold for 1 minute. Repeat 2 times. Then get up and do your happy dance! You are on your way to a strong core and flat abdominals!

Day 9: Hold for 70 seconds: Repeat 2 times.

Day 10: Hold for 80 seconds. Repeat 2 times.

Day 11: Hold for 90 seconds. Repeat 2 times.

Day 12: Hold for 100 seconds. Repeat.

Day 13: Hold for 110 seconds Repeat.

Day 14: Hold for 2 minutes! You did it!!!!!

Notice how you do more repetitions with the shorter holds. I have developed this program so that you ease into the two minute plank. If while you are holding the plank, you start to feel it in your back, stop. In Pilates, the form is more important that the repetitions or how much weight you lift. This program will assure that you are able to hold Plank with proper form and keep tension out of your back and neck. Newer exercise students make take longer than the two weeks to accomplish the two minute hold. Always listen to your body and do the exercise with ease. Also, don’t forget to breath. Holding your breath will not help you on this series.

This exercise is really great for anyone who is post-natal. I recommend walking, planks, and kegels for the first six months.